Kotlin. Getting started
Preface
Kotlin is a wonderful language today mostly used for android application development. But it’s a general-purpose language and could be used for backend either. This post is aimed to provide a comprehensive guide on how to start server-side programming for people who aren’t familiar with the language.
IDE
Kotlin was invented in JetBrains, the company which is famous for the best IDE in the world IntelliJ IDEA. So Idea has amazing support of Kotlin out of the box.
New project
IDEA has a built-in wizard for a new project. In the first step, we need to choose a gradle project. Gradle is the most common build tool for Java/Kotlin projects.
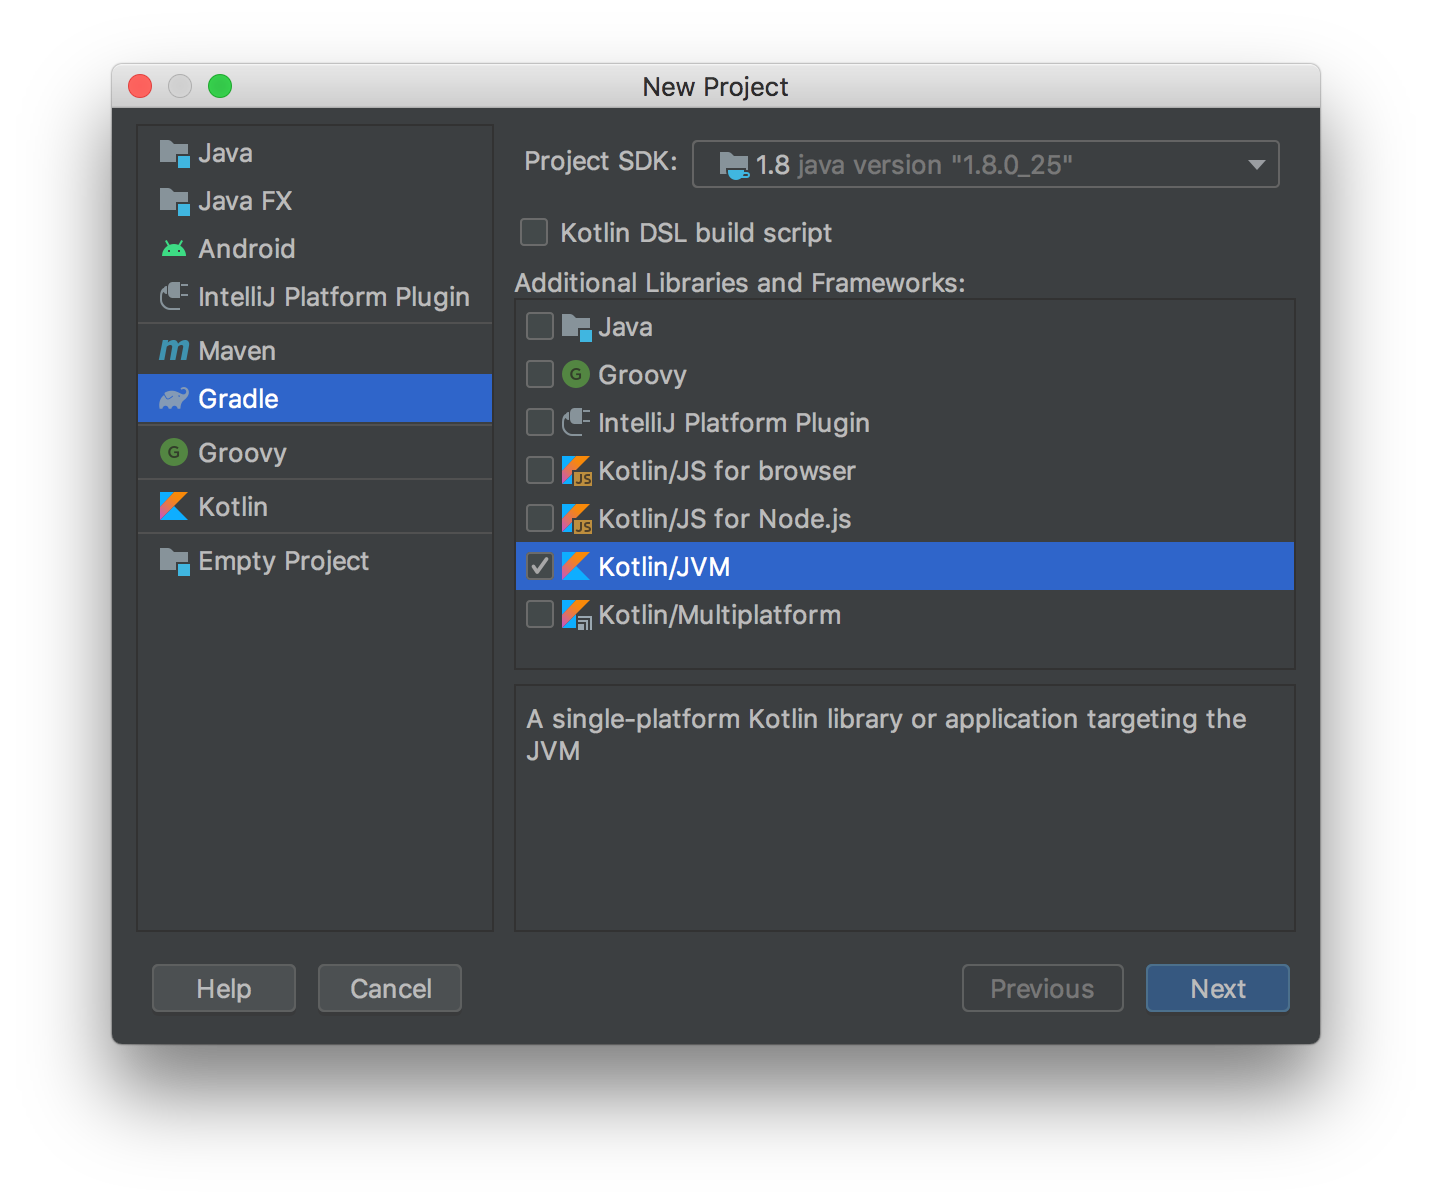
IDEA will create a basic project structure for you
.
├── build.gradle
├── gradle
│   └── wrapper
│       ├── gradle-wrapper.jar
│       └── gradle-wrapper.properties
├── gradle.properties
├── gradlew
├── gradlew.bat
├── settings.gradle
└── src
    ├── main
    │   ├── java
    │   ├── kotlin
    │   └── resources
    └── test
        ├── java
        ├── kotlin
        └── resources

11 directories, 7 files
I recommend updating gradle immediately on this stage. IDEA by default generates so-called “gradle wrapper” which is a good approach. It allows you to fix gradle version in the project and always use this vendored version.
To update gradle you need to go to the gradle/wrapper/gradle-wrapper.properties config and change version in distributionUrl property.
Before:
distributionUrl=https\://services.gradle.org/distributions/gradle-6.1.1-bin.zip
After:
distributionUrl=https\://services.gradle.org/distributions/gradle-6.6.1-bin.zip
Thus we change gradle version from v6.1.1 to v6.6.1. After it, IDEA will do the rest for you.
Hello world
Now we ready to write our first code in Kotlin: src/main/kotlin is our main folder for code. Let’s create a package first, as it is used to do in the Java-world. The next step is to create a file for source code, I prefer to name it main.kt but it doesn’t matter, you can name it whatever you want.
package su.bohr.kronstadt

fun main() {
    println("Hello world!")
}
Cool. Now we can start the code in the IDE. But there is no IDE on a server, so let’s go and build an artifact. For this, we will need a gradle application plugin. In build.gradle we need to add a section like
application {
    mainClass = 'su.bohr.kronstadt.MainKt'
}
If the source file has no class in it, Kotlin will create the class for you and name it in pascal-case. Be careful with the property name. For gradle 6.0 it’s called mainClassName and for version 6.1 it is mainClass. Can be very confusing.
Also, we need to add an application plugin to the plugins section like this
plugins {
    id 'application'
    id 'org.jetbrains.kotlin.jvm' version '1.3.72'
}
Now we can run our app from the console:
$ ./gradlew run
But there is no artifact yet. To create an artifact we need another task
$ ./gradlew build
It will create a lot of interesting stuff in the build directory
build
├── classes
│   └── ...
├── distributions
│   ├── kronstadt-1.0-SNAPSHOT.tar
│   └── kronstadt-1.0-SNAPSHOT.zip
├── kotlin
│   └── ...
├── libs
│   └── kronstadt-1.0-SNAPSHOT.jar
├── scripts
│   ├── kronstadt
│   └── kronstadt.bat
└── ...

20 directories, 66 files
Archives in distributions are you artifacts you can deploy to the server. Choose your favorite archive format and send it to the server. Let’s try
$ tar xf kronstadt-1.0-SNAPSHOT.tar
$ cd kronstadt-1.0-SNAPSHOT
$ ./bin/kronstadt
Hello world!
Awesome. You see how application plugin generated script to run our app and grandmotherly put it the bin directory.
It is also possible to create a single all-in-one jar file (aka uberjar) which can be launched with command java -jar kronstadt.jar, but it’s not idiomatic.
Adding tests
There is a neat testing library for Kotlin called Spek. It uses very expressive syntax inspired by ruby rspec.
Add jcenter first
repositories {
    jcenter()
    mavenCentral()
}
Add dependencies to the build.gradle
dependencies {
    implementation "org.jetbrains.kotlin:kotlin-stdlib-jdk8"

    testImplementation "org.spekframework.spek2:spek-dsl-jvm:2.0.13"
    testImplementation "org.jetbrains.kotlin:kotlin-test:1.3.72"
    testRuntimeOnly "org.spekframework.spek2:spek-runner-junit5:2.0.13"
    testRuntimeOnly "org.jetbrains.kotlin:kotlin-reflect:1.3.72"
}
Setup the test task
test {
    useJUnitPlatform {
        includeEngines 'spek2'
    }
}
Now we are ready to write our first test in src/test/kotlin folder. To be able to access the testee code without import we need to put tests to the same package.
package su.bohr.kronstadt

import org.spekframework.spek2.Spek
import org.spekframework.spek2.style.specification.describe
import java.io.ByteArrayOutputStream
import java.io.PrintStream
import kotlin.test.assertEquals

object MainTest: Spek({
    describe("function main") {
        val output by memoized { ByteArrayOutputStream() }

        beforeEachTest {
            System.setOut(PrintStream(output))
        }

        it("prints hello world") {
            main()
            assertEquals("Hello world!\n", output.toString())
        }

        afterEachTest {
            System.setOut(null)
        }
    }
})
As you can see spek uses Kotlin advanced features like objects and reflection to make syntax expressive.
You can run tests from IDE or from the console with
$ ./gradlew test
I also encourage you to consider Kotest as it looks very nice
Adding linter
Linter is a very important tool, especially for newcomers. For kotlin I like to use detekt. Detekt is shipped with gradle plugin to simplify configuration. So in build.gradle add
plugins {
    id 'application'
    id 'org.jetbrains.kotlin.jvm' version '1.3.72'
    id("io.gitlab.arturbosch.detekt").version("1.13.1")
}
Then we need to generate a config file
$ ./gradlew detektGenerateConfig

> Task :detektGenerateConfig
Successfully copied default config to kronstadt/config/detekt/detekt.yml

BUILD SUCCESSFUL in 790ms
1 actionable task: 1 executed
Then reference the newly generated config inside the detekt closure.
detekt {
    toolVersion = "1.13.1"
    config = files("config/detekt/detekt.yml")
}
Add klint formatting rules
dependencies {
  // ...
  detektPlugins "io.gitlab.arturbosch.detekt:detekt-formatting:1.13.1"
}
That’s it. The basic configuration is over. To run detekt just put in the console
$ ./gradlew detekt
HTTP Server
As a fan of ruby’s roda I prefer minimalistic web servers. Luckily there is one for Java/Kotlin. Meet Spark!
Add dependency to build.gradle
dependencies {
  // ...
  implementation "com.sparkjava:spark-kotlin:1.0.0-alpha"
  implementation "org.slf4j:slf4j-simple:2.0.0-alpha1"
}
Let’s rewrite our main function
package su.bohr.kronstadt

import spark.kotlin.Http
import spark.kotlin.ignite

fun main() {
    val http: Http = ignite()

    http.get("/hello") {
        "Hello world!"
    }
}
And test it with curl
$ curl localhost:4567/hello
Hello world!%
Very good!
Docker
As all cool guys, we will deploy our app with docker.
Dockerfile will look like
FROM openjdk:8 AS build-stage

WORKDIR /opt/app
COPY . .
RUN ./gradlew distTar

FROM openjdk:8

COPY --from=build-stage /opt/app/build/distributions/kronstadt-1.0-SNAPSHOT.tar /opt/app/kronstadt-1.0-SNAPSHOT.tar

WORKDIR /opt/app
RUN tar xf kronstadt-1.0-SNAPSHOT.tar && rm kronstadt-1.0-SNAPSHOT.tar

WORKDIR /opt/app/kronstadt-1.0-SNAPSHOT
CMD ./bin/kronstadt
Build:
$ docker build -t kronstadt .
Run:
$ docker run --rm -p 4567:4567 kronstadt:latest
Test:
$ curl localhost:4567/hello
The end!